Shopping Cart
(0)
Free shipping included — no minimum on any US order

Quick Search:


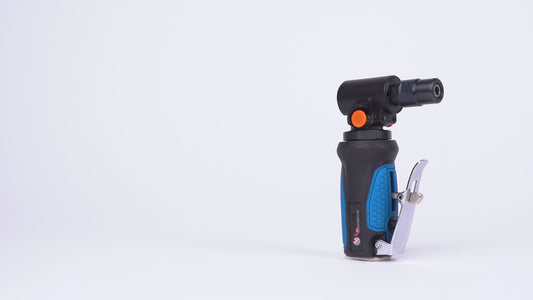


A pneumatic angle grinder can remove a weld, cut seized hardware, clean corrosion, or prep steel for paint in minutes. But it only performs that way when the air supply, wheel, guard, and workpiece are set up correctly. Learning how to use a pneumatic angle grinder starts before you pull the trigger.
An air grinder is only as strong and consistent as the compressed-air system behind it. Check the tool's rated operating pressure and air consumption in CFM, then compare those numbers with what your compressor can actually deliver. Most pneumatic angle grinders are rated around 90 PSI at the tool inlet, but always follow the rating printed in the manual or on the tool.
CFM matters more than tank size during sustained work. A small tank may let the grinder spin quickly for a few seconds, then lose power as pressure drops. If the grinder slows noticeably while grinding or cutting, the issue may be compressor output, a restrictive hose, or an undersized fitting rather than the tool itself.
Use a regulator with a gauge near the work area so you can set pressure accurately. A filter is just as valuable. Moisture, rust flakes, and compressor debris can damage the motor vanes and create inconsistent performance. For regular shop use, install a filter-regulator and drain the compressor tank on schedule.
Hose diameter is another common bottleneck. A long, narrow hose can starve a high-speed grinder even when the compressor gauge looks fine. For most shop grinders, a 3/8-inch inside-diameter hose is a practical choice, especially when the hose run is long. Keep quick-connect fittings clean and replace damaged couplers that leak air.
Before connecting air, inspect the grinder body, trigger, throttle, spindle, guard, and air inlet. Confirm that the guard is secure and positioned between you and the wheel. Never remove a guard just to reach a tight spot. Use a different tool, a smaller grinder, or an accessory designed for that space instead.
Select the accessory for the work, not simply for what is already mounted. A thin cutoff wheel is for cutting metal, while a thicker depressed-center grinding wheel is for shaping welds and removing material. Flap discs are better for blending and surface prep. Wire wheels remove rust, paint, and scale, but they can throw sharp wire fragments and should be treated with the same respect as an abrasive wheel.
Match the wheel's rated RPM to the grinder. The wheel's maximum RPM must meet or exceed the grinder's free speed. A wheel that is too small or too slow for the tool can fail at speed. Check for cracks, chips, moisture damage, excessive wear, or a damaged center hole before every use. If a wheel has been dropped, do not gamble on it.
Install the wheel with the correct flange and retaining nut. The accessory should sit flat and center properly on the spindle. Tighten it securely with the supplied wrench, but do not over-tighten to the point that future removal becomes a fight. Disconnect the air hose before changing any wheel or attachment.
Unless your air system has a properly adjusted inline lubricator, add a few drops of pneumatic tool oil into the air inlet before use. This protects the internal motor vanes from dry wear. Do not use motor oil, penetrating fluid, or heavy grease. Those products can gum up the tool or carry contaminants into the air motor.
If the grinder is used daily, lubrication should be part of the start-of-shift routine. A tool that sounds rough, runs slowly, or needs more air than usual may be dirty, under-lubricated, or due for service.
Do not hold the workpiece in one hand and run the grinder in the other. Clamp steel securely to a workbench, welding table, or vise. Make sure the cut section is supported so it cannot pinch the wheel as it separates.
This is especially critical with cutoff wheels. When a wheel binds in a closing kerf, the grinder can kick back hard or shatter the disc. Plan the cut so the material is supported on both sides, or position the support so the kerf stays open as the cut progresses.
Clear the area of fuel, solvent, oily rags, sawdust, aerosol cans, and other flammables. Grinding produces sparks, and cutting can send them farther than expected. Keep a fire extinguisher close when working around vehicles, shop storage, or painted surfaces. Let hot metal cool before setting it near hoses, wiring, or other materials that can burn.
Wear safety glasses with side shields and a face shield. Add hearing protection, work gloves that fit snugly, long pants, and closed-toe work boots. For grinding paint, coatings, rust, or unknown material, use appropriate respiratory protection and control dust. A face shield is not a replacement for safety glasses, and gloves will not stop a failed wheel.
Connect the air hose, set the regulator to the tool's required pressure, and check that the trigger returns freely. Hold the grinder with two hands whenever the tool design allows it. Stand slightly to one side of the wheel's plane, not directly in line with it. If an abrasive wheel fails, fragments are more likely to travel along that plane.
Start the grinder and let it reach full speed before touching the material. Run a new wheel at no load for about a minute in a safe direction before beginning work. Listen for vibration, wobble, or an unusual sound. Stop immediately if anything feels wrong.
For grinding, use the edge of a depressed-center wheel at a shallow angle, generally around 15 to 30 degrees from the surface. Keep the grinder moving with steady, moderate pressure. Forcing the tool does not remove material faster if the wheel bogs down. It builds heat, wears the abrasive unevenly, and can overload the air motor.
For a flap disc, use a flatter angle and broader passes. Let the abrasive do the work. This is the better approach when you need a cleaner finish before welding, painting, or coating rather than aggressive stock removal.
With a cutoff wheel, use the wheel straight on. Do not twist, side-load, pry, or use a cutoff wheel for grinding. Make a controlled entry, follow the cut line, and let the wheel feed at its own pace. If it starts to bind, release the trigger, wait for the wheel to stop, and correct the work support or your cutting angle.
For wire-wheel work, keep a firm grip and use light pressure. The brush can catch sharp edges, seams, and holes. Work from stable positions and stay aware of where loose rust, coating chips, and wire fragments are going.
Heat is the enemy of both the metal and the accessory. On thin sheet metal, work in short passes and allow the panel to cool between them. Staying in one spot can warp the panel, burn through it, or leave a deep low area that takes longer to repair.
If the grinder chatters, bounces, or leaves gouges, check the wheel type, contact angle, and pressure before blaming the tool. Often the fix is to reduce pressure, use a fresh disc, or switch from a hard grinding wheel to a flap disc. For weld cleanup, remove the bulk of the bead carefully, then blend the surface rather than trying to finish everything with one aggressive wheel.
Kickback usually comes from binding, catching an edge, or using the wrong accessory. Keep the guard correctly positioned, maintain a balanced stance, and avoid reaching across the work. Never work while tired, rushed, or trying to hold the tool in an awkward one-handed position.
Release the trigger and wait until the wheel stops completely before setting the grinder down. Disconnect the hose before inspection, wheel changes, or storage. A connected air tool can start unexpectedly if the trigger is bumped or a hose is moved.
After use, wipe off metal dust and check the wheel for damage. Add a few drops of air tool oil to the inlet, reconnect the hose briefly, and run the grinder for a second or two to distribute the oil internally. Then disconnect it and store it in a dry place.
A pneumatic angle grinder earns its place in a shop because it is fast, compact, and ready for hard work. Give it clean, regulated air, the right wheel, and a secure work setup, and it will help you move from rough metal to finished work without losing time to preventable mistakes.






 AIR REGULATORS

 ACCESSORIES